
Tuesday, May 24, 2016
Review: Family Lunch Date at Bill's Resturant

This post is a little bit overdue, but it doesn't mean it is any less important or interesting. If you love good food ( like me) I am sure you have probably been to a number of raved about restaurants.
My first time at Bill's was with my colleagues and I fell in love! When I met up with my Mum and sister for a rainy weekend catch-up the other day, I knew we had to find another location and sample the food together.
Bill's reminds me of a homely and rustic cabin; the choice of furniture and decoration is mostly wooden or rusty, making the most of wooden benches, chalkboards and rows and rows of colourful bottles and greenery on display. It might have been the deary weather, but the Saturday afternoon we went was quietly busy and was a nice lazy lunch with some home cooked body warming food.


I usually go for something that sounds exotic, but this time, I chose a classic (well done) 10oz rib eye steak with chips and a creamy Bearnaise, peppercorn and garlic butter sauce. Despite the steak being cooked almost to crisp, it was pretty tender and seriously juicy- I've never devoured a steak so quickly, it was a no-frills meal that seriously hit the spot.


Kelita (my sister) ordered a Duck Pie served with red cabbage- a bit of gamble, considering duck can be extremely greasy and more fat than meat. I almost ordered the same thing, but wasn't brave enough to chose duck over the other safer option which was Fish Pie. She said it was 'different', probably because duck is quite an acquired taste, but she liked it all the same.

My Mum is a tricky one when it comes to eating out, but she *absolutely loved* (quote quote) her Mojo chicken skewers which came with came with piadina bread. The portion came out looking quite small, but it was

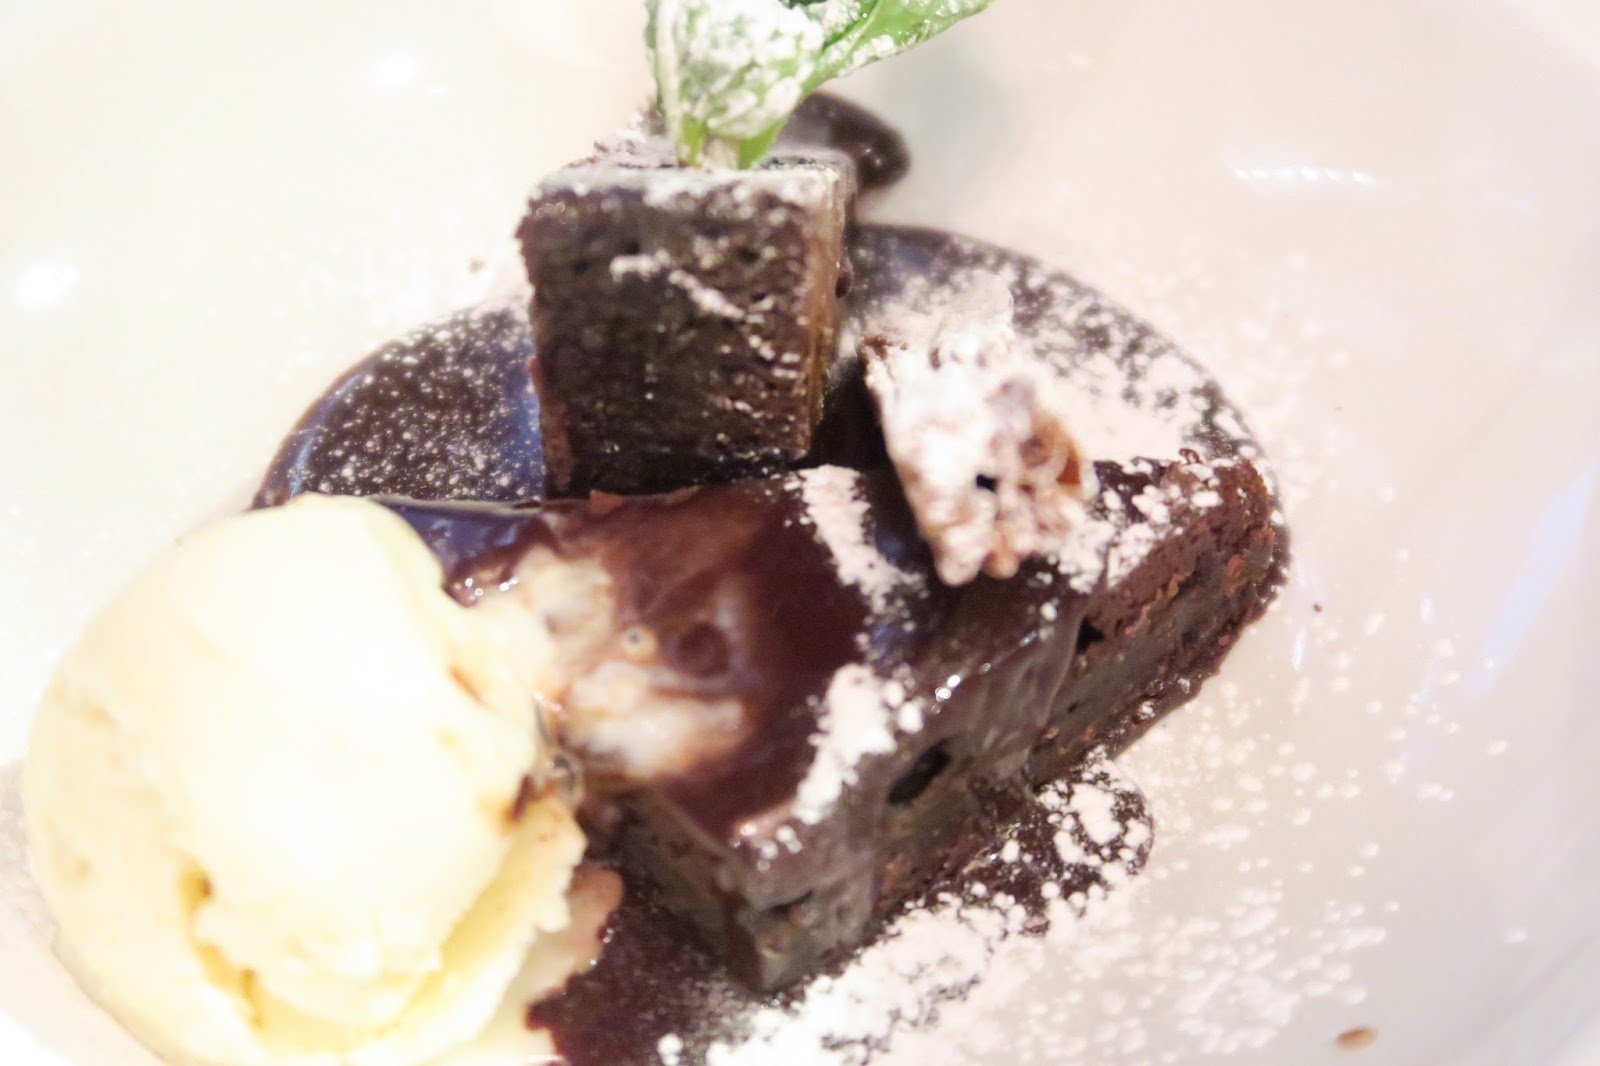
Our family never leaves a restaurant without at least looking at the desserts menu,so after we argued between ourselves that we were far too full to have dessert, we ordered one each anyway and waited for them to come out feeling a little bit sheepish. Since we couldn't decide what to get, we agreed to sample a bit of each other's desserts; I had a small but filling plate of chocolate brownie that was incredibly moist and gooey, Kelita had pancakes and my Mum had classic waffles.


The service was really quick and our waiter at least made an effort to crack some jokes and make light conversation. I can't really fault Bill's , and thankfully, because there are plenty of restaurants across the country, if you're feeling a little hungry after reading this, you might be able to taste some of these dishes for yourself in no time!
To good food!
God Bless,

Saturday, March 12, 2016
Bra-blems: Bra Issues and Hacks to fix them!

Here’s a sad story- I just went through a "bra breakup".
I’m sure we all have that one bra that fits very well, doesn’t hurt our back and doesn’t show up through sheer shirts, so we wear it all the time (obviously washing at regular periods). This week, my favourite bra decided to break and stabbed me in the chest while I was minding my own business and getting on with my day. I had to wait in pain until I could get home and assess the damage and mortified to find that the wire had completely broken through the fabric.
I’m sure we have all been there and experienced some “bra-blems”, so I thought I would share some advice on how to go about fixing these problems.


"Wire stab" problem
The easiest thing to do is to sew up the problem. Cover the end of the wire with some tape ( masking tape is the best for this) to smooth out the sharp edge and prevent more piercing. Re-insert the wire and sew the fabric back together, securing the stitches with fabric glue or clear nail paint
TIP: I had to learn the hard way, but, you should store your bras open in a drawer, not "cup within cup" or folded as it can mess up the moulding and cause the underwire to pierce through the fabric
TIP: I had to learn the hard way, but, you should store your bras open in a drawer, not "cup within cup" or folded as it can mess up the moulding and cause the underwire to pierce through the fabric

"Slipping strap" problem
If your straps are slipping, it seems obvious, but try tightening the straps, ensuring that they are the same length. One strap that is too long will create a gap in the strap pn the other side and will give you lopsided support.
TIP: use a pantyliner! This sounds weird but if you cut a thin strip from an unused pantyliner and place the sticky side against your skin, your straps are less likely to slip anywhere!

"Straps digging-in" problem
Time for a smaller band! Digging straps means that either your band has stretched out or you have purchased a band that is too big in the first place.
TIP: Sometimes I like to go for a great strapless- it frees the heavy feeling in my shoulders and I, of course, don't struggle on that day with strap problems.

"Quad boob" problem
I used to get this all the time, especially when I wore tighter shirts. This can be fixed by going up a cup size e.g. if you are a 36b, you should be buying a 36c
TIP: How can you tell if you have the right bra size? If you lift your arms over your head and your band is lying flat and the cups contain all of your breast tissue, then you are wearing the right size!
Of course, some bras are beyond repair because they are worn down or faded; if that is the case, throw them out and then you can head over to ThirdLove for a brand new bra! ThirdLove help you to find the perfect bra fit in a variety of styles and sizes; they even have an app for virtual sizing!
The lovely people have provided me with a coupon code for buyers from my blog: just enter PERSONALITY at the checkout for 15% off.
Thank you to ThirdLove for inspiring me to write this post and for providing the graphics. You can check out more "bra-blems" over at thirdlove.com, or by downloading the FREE iPhone app from the App Store!
♡ thirdlove.com
♡ Third Love app
disclaimer: I am not being paid to feature Third Love on my blog. The promo code is not a partner/ affiliate link and the graphics were provided by Third Love.
God Bless,

Sunday, February 21, 2016
UNBOXING: Clarisonic Aria Keith Haring Edition


I've wanted a Clarisonic for as long as I
can remember.
I have had a problem with my skin for quite some time and
the idea of cleaning my face with a sonic brush has always appealed to
me- especially after spending so long in the bathroom scrubbing my face
with a manual face brush.
I decided to
take the plunge this week and invest in one while biting my tongue the whole
way through the checkout process, knowing full well that I could have saved the money for
something else. I placed an order last Monday on the official Clarisonic website and I received the order by the Thursday.
Since I am a little late on the whole
sonic cleansing system hype, I was pretty impressed with the look and
feel of the Clarisonic. I know that the Aria was launched in 2013, as an
upgrade of the previous Mia versions. The Aria is lighter and slimmer and feels pretty solid in the hand.This unit is a little different though as I managed to
get my hands on the limited edition Keith Haring Aria; the cleansing
device is red and it comes with a pouch designed by Keith Haring.The box includes the Mia system and a pouch that holds the USB-enabled magnetic Universal Voltage Plink Charger, wall adapter and drying base, as well as a sample size cleanser.
I'm
in love with the pouch design, the zip tag is in the shape of a mini
Clarisonic and the inside of the pouch is covered in one of Keith
Haring's iconic designs. I love getting these kind of pouches with
purchases because I like to use them as makeup bags, so I think this one
will be going straight into my work bag.
To
charge the unit, you have to use plink charger and wall adapter. The
magnetic charger attaches to the base of the Aria and connects to a wall
socket through the plug adapter. This makes the unit travel friendly-
instead of taking the drying stand, you can charge the unit using only
the Plink charger, which is handy because the drying base is pretty
chunky!
I was pretty impressed with the magnetic function, but I will have to see for myself if this is a gimmicky feature.
It
was a nice surprise to find the sample sized cleanser included in the
pack, although I am a little hesitant to use it. My skin is pretty
normal and doesn't react too much to different products, but since I have
established such a solid skin care regimen already, I wouldn't want to
change it.
I'm pretty excited to use my Clarisonic although I wasn't impressed with the 24 hour charging time- I'm hoping that it lasts for quite a while.
Have you used a Clarisonic? Let me know?
Happy Cleansing
God Bless,

Thursday, December 31, 2015
RPG Show Ombre Wig Unboxing + How I apply wigs!

It is finally the end of 2015! This year was a great year for my hair because I decided to take the plunge to change up my look and invest a little money into a new hair style. Ever since I was young, I would only wear my natural hair or braids, but I decided a little after my birthday in March that I wanted that to change.
Enter RPGShow and the purchase of my very first full lace wig- the "Kylie". Since then I have been thoroughly convinced that full lace wigs are the way to go for a quick hairstyle that remains intact but gives me an opportunity to care for my own hair every day.
My second purchase was made during the Black Friday deals so I managed to get over $100 off, which is actually a bargain. My unit is a full lace ombre unit, part of the stock collection, which basically means that the hair is already available on the website and doesn't need to be ordered.
I really appreciate the RPGShow packaging and contents- I honestly expected my first wig to come in a flimsy plastic bag. The first wig box was black and matte, but this one was pink with black lace. Just like the other box, there was an additional wig cap, hair brush and magazine.


The information for my unit is as follows:
Style Number: ns001-s
Hair Colour: Same as pictured
Hair Length: 18”
Hair Texture: Silk Straight
Lace Colour: Light Brown ( should be medium brown)
Cap Construction: Glueless Lace Cap
Cap Size: Size 1
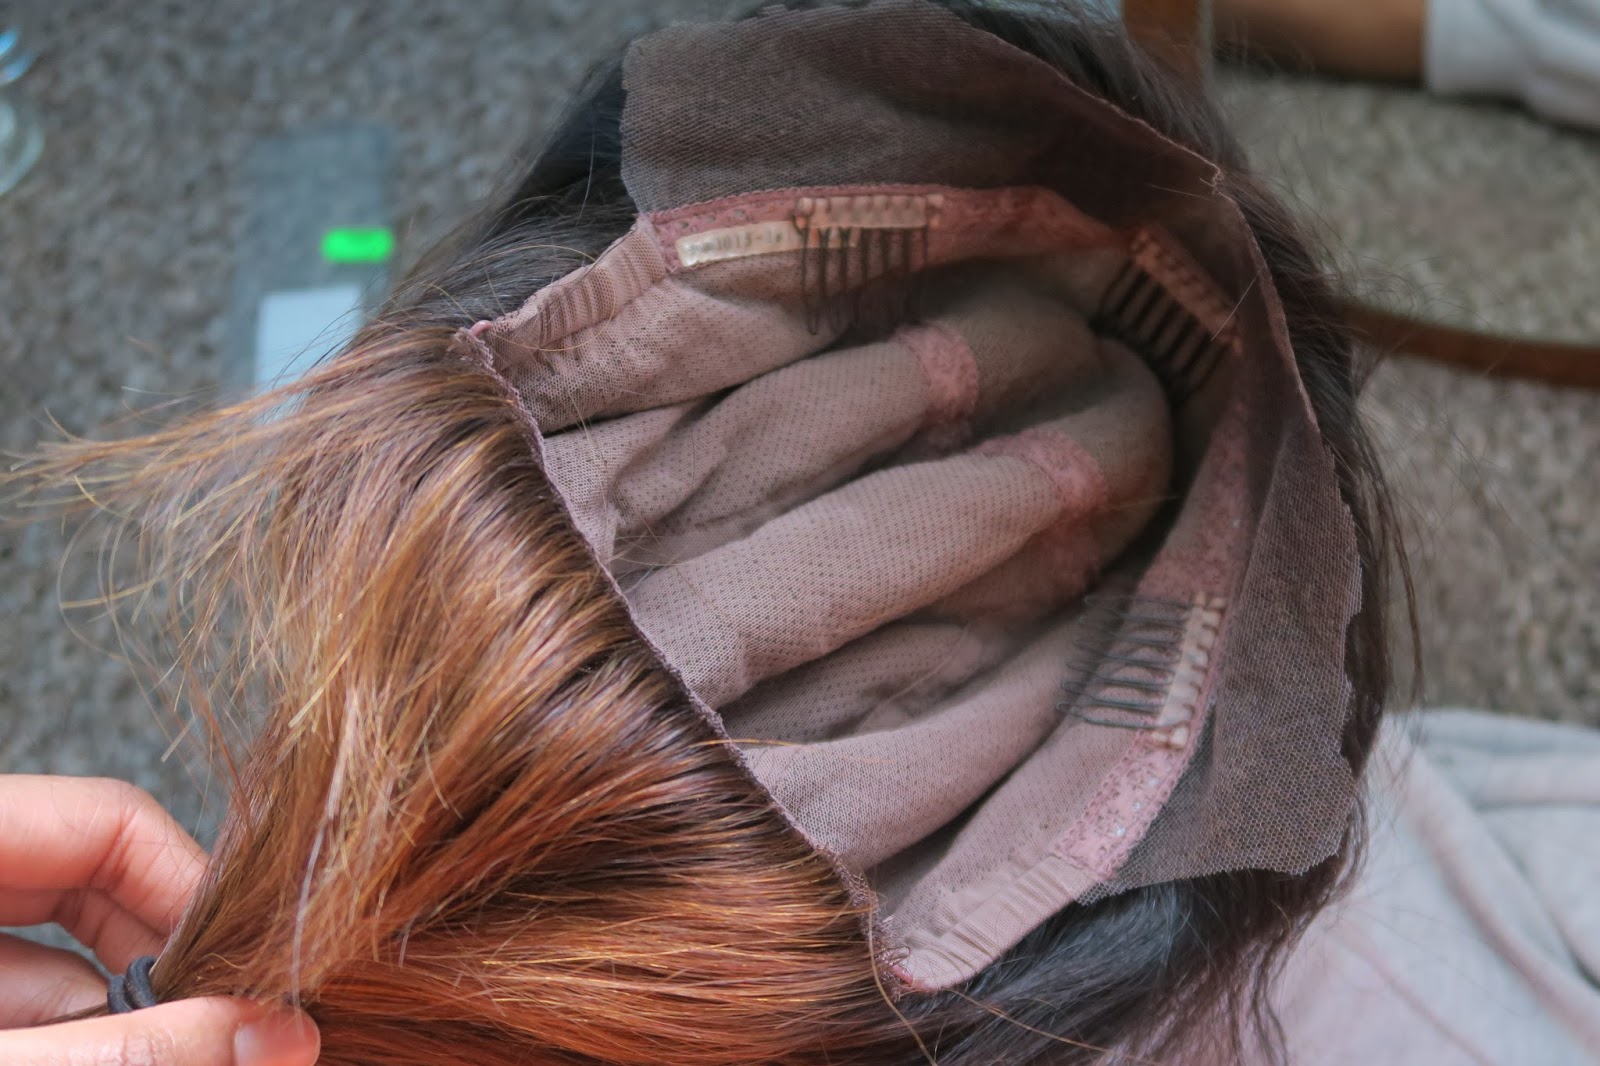
I love using full lace wigs because of the security and how realistic they look. The wigs comes with three scalp grips on the inside as well as an adjustable band at the back of the head. I rarely use the scalp grips and yet the wig never moves an inch. However, I do secure bobby pins to the sides of my head to stop the unit riding up at the front/centre and creating a gap between my hairline and the wig hairline. I don't think this is a problem for most people, I just have a weird shaped head.


Ombre is a hairt colour that is way out of my comfort zone, but I saw this and instantly fell in love. The ombre is a dark brown/black to light brown rather than a blonde so it is perfect for this time of year. I took a bit of gamble on the hair texture-The "Kylie" unit had a Yaki texture, which is supposed to be similar to an afro texture of hair, whereas this unit is similar to a Caucasian silky hair texture.
However, I love the feel of the unit, it appears to be a lot easier to maintain and is noticeably lightweight/ thinner.


To prepare the wig, you have to remove the excess lace from the forehead, sides and nape. I usually place the unit on my head to get an idea of where to cut first and begin by pulling the hair back into a tight ponytail for accuracy. Then I slide a finger under the wig hairline and pull and cut lace as close to my own hairline as possible to create a cleaner cut. This took forever with my first wig, but once you know what you are doing, this step is pretty straight forward. To cut the nape, you might want to take the wig off, just in case you slip and cut thr ponytail.


Next, I like to pull out some of the hairs along the parting. On cheaper wigs, the parting isn't at all visible and looks extremely unrealistic. Lace wigs have a parting but it is extremely narrow and would look much better if widened. I have seen various methods for this, some people like to use tweezers or even scissors but I find it easier to wrap a couple hairs around my finger close to the scalp and yank quickly. You have to be careful because this method can damage the unit, but it gets rid of hairs a lot quicker. I recommend taking a tiny pinch of hairs at a time.

Lastly I apply a small amount of concealer to the parting that is close to my scalp colour and blend so that the colour of the lace isn't too dark. Currently, I use MAC Studio Finish Concealer in NC45 since my scalp is a cooler shade than my face, however in the summer, I might need something warmer. I like to take a chunk of the concealer and store it in a small pot because it isn't a good idea to mix an oily brush into a face product, unless you are expecting a breakout. The result is a more seamless hairline and scalp.


I have had my Kylie unit since May and it still looks fresh every time I wash and style it- people are convinced I have a whole new unit of hair! Therefore, I think this unit will last just as well, it will be interesting to see how it keeps in comparison to the Kylie because of texture and of course, the length.
I will do an update post in a few months to see how it turns out.
*
Thanks for reading, if you have any questions about the unit, feel free to ask me.
I hope you all have had a wonderful 2015 and I hope you have an even better 2016!
Happy New Year
God Bless,
Monday, December 14, 2015
REVIEW: Go Native Apartments, Kensington


I honestly can't complain about my job, especially when I have the opportunity to travel with my team to different events- last month I went along to the Ideal Home Show as an exhibitor.
I don't know why, but I always look forward to staying in a hotel while away, especially if I haven't stayed there before- so I was in for a treat when I stayed at Go Native Kensington, serviced apartments in Central London. The hotel location was perfect, close enough to London Olympia but tucked away from the hustle and bustle of traffic; in addition there was a large Tesco at the end of the street.
I shared a two bedroom apartment with kitchen with a colleague and was instantly impressed with how clean and spacious it was, not to mention how many amenities were included in the apartment.
I really appreciated the double bedroom and ensuite; there was enough space on the floor for my suitcase (and mess) and plenty of wardrobe space to hang up clothes. Since the apartment was self serviced, the kitchen was fully stocked with utensils, even a washing machine/ tumble dryer and dishwasher.
My only complaint was with the heating system, which didn't seem to work, but the hotel swiftly provided replacement heaters.
This was a great place to come back to every night after the event and I managed to get a great night's sleep without waking up in thee middle of the night because of noise next door or on the floors below.
Thank you Go Native for a great stay!

Subscribe to:
Posts (Atom)